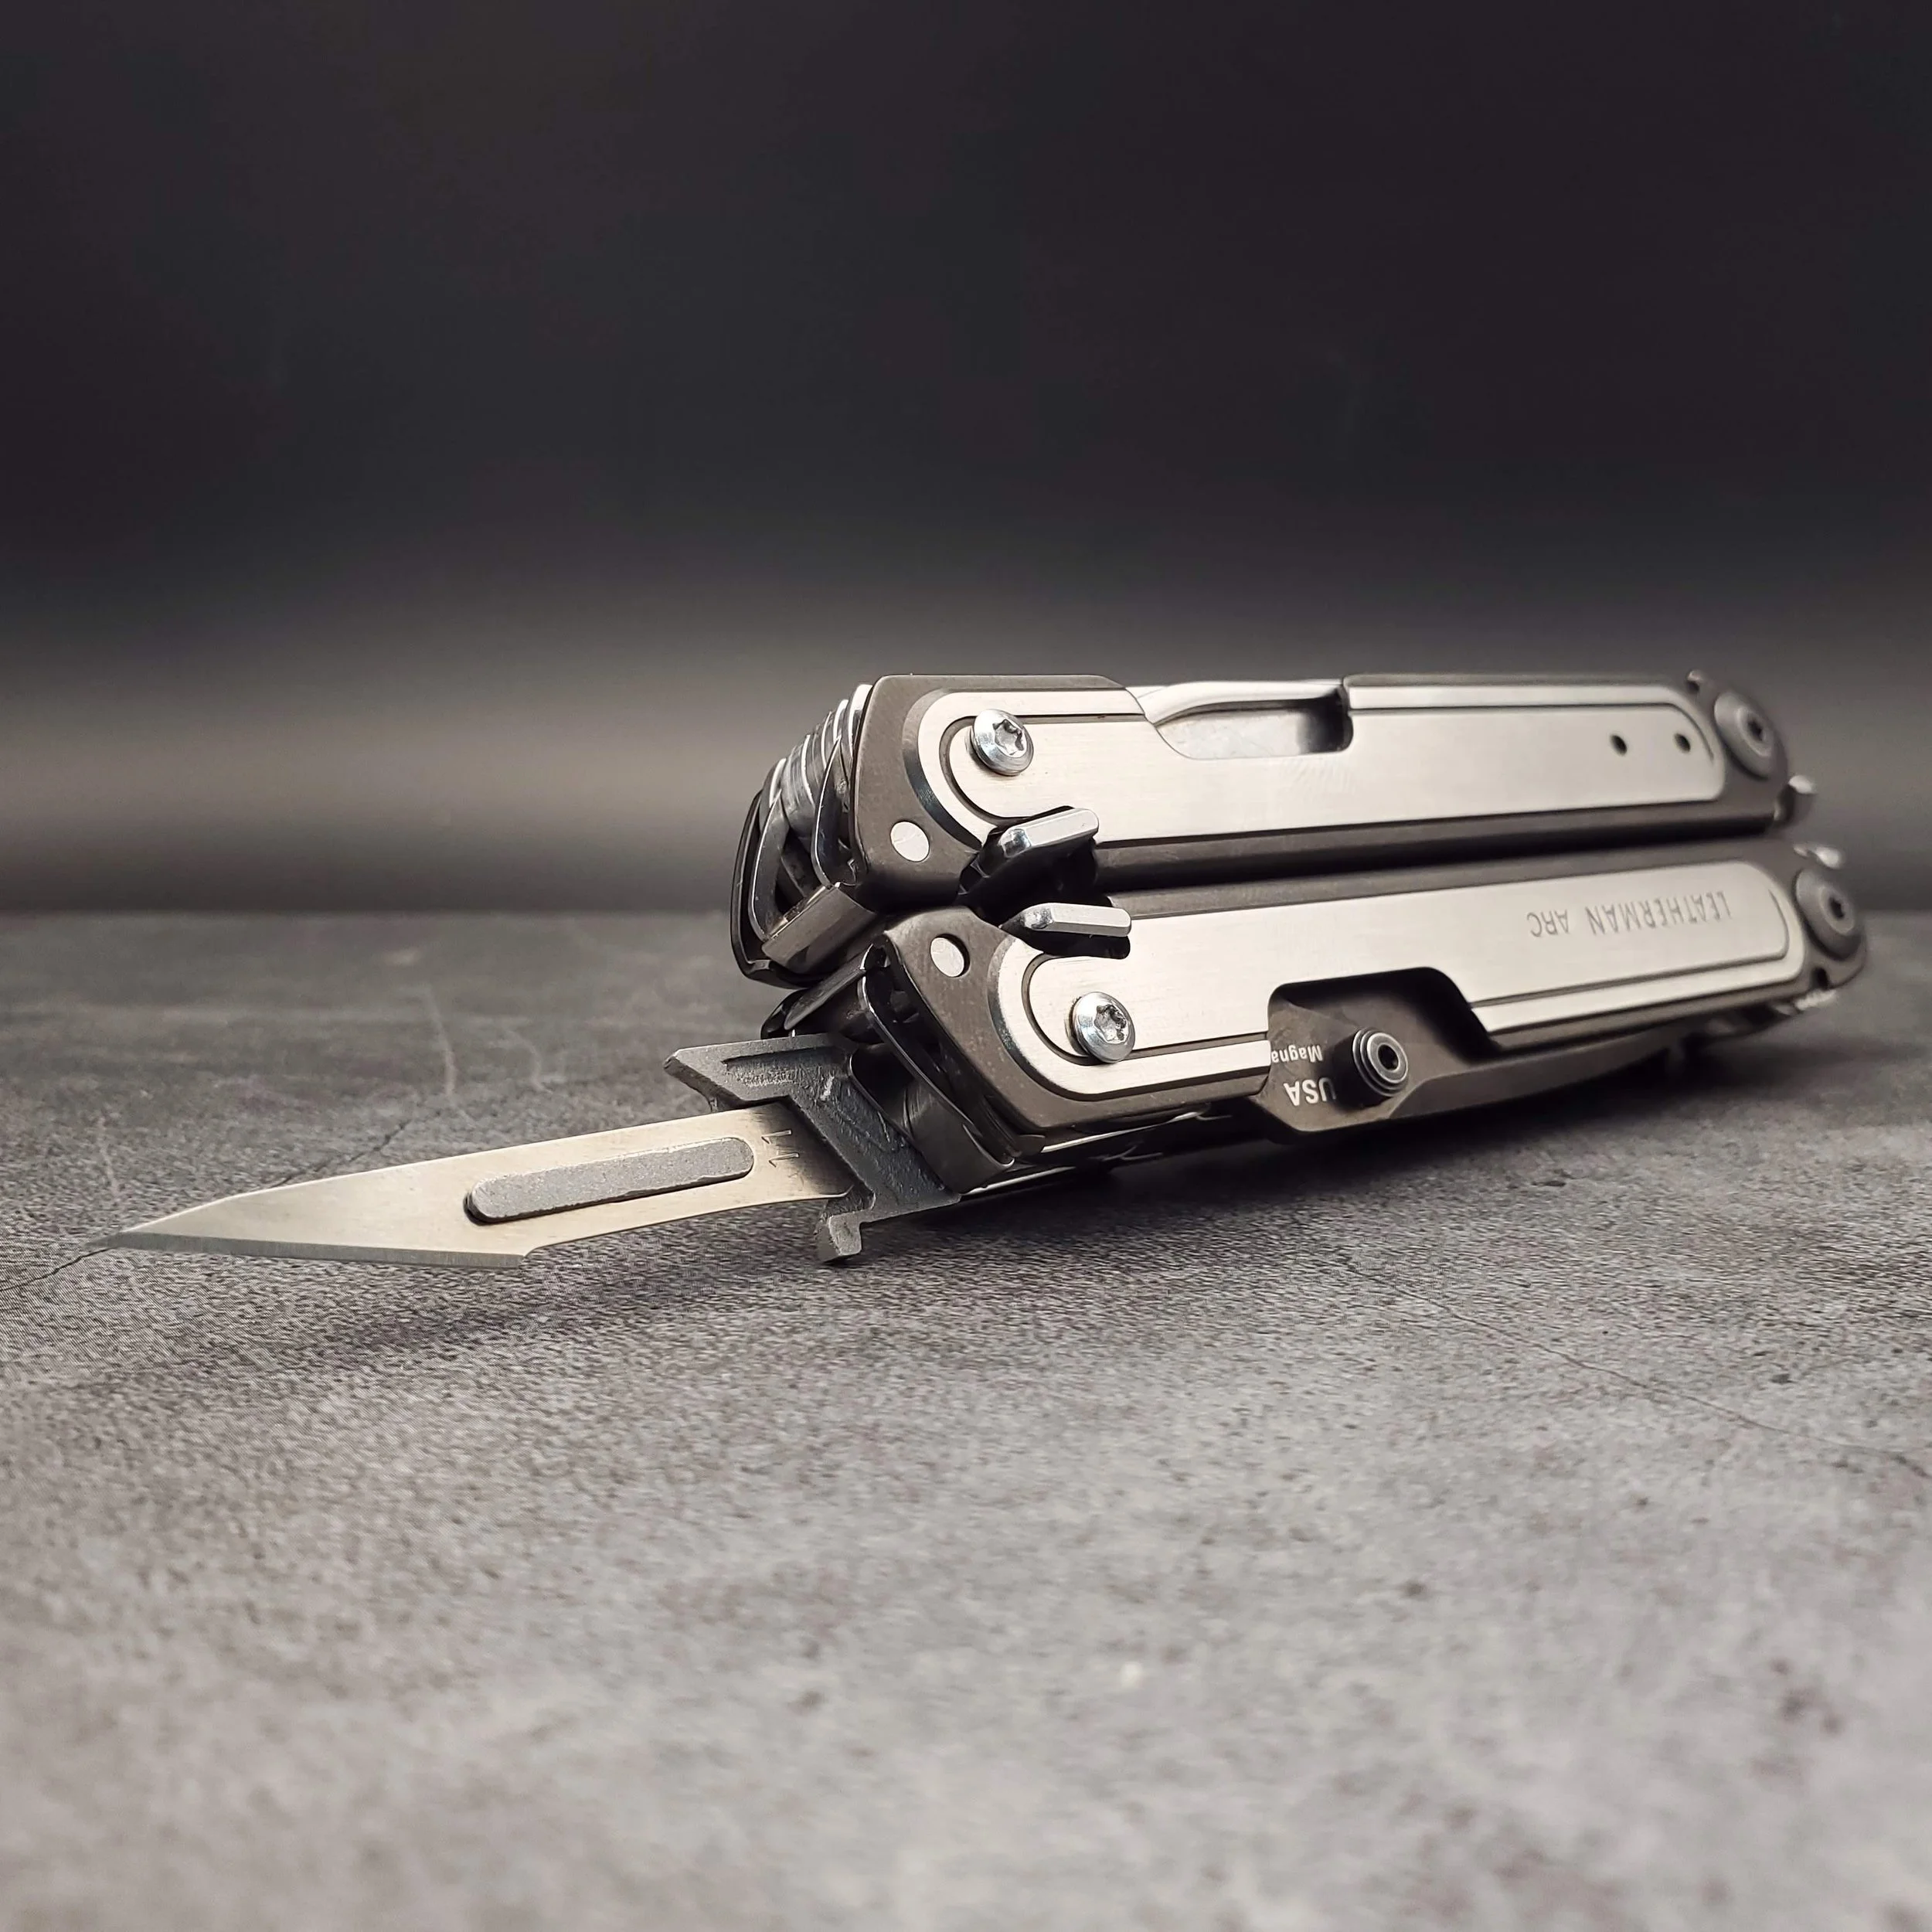
Scalpel Blade Holder for Leatherman Arc and Free Series
Scalpel Blade Holder for Leatherman Arc and Free Series
This part requires outsourcing the printing before I do the hand finishing. As a result of the supply chain, depending on current demand the scalpel blade holders may take longer than my usual processing time if I am waiting on a shipment of unfinished parts.
This part is designed to replace either the can opener or the eyeglass bit holder on the Leatherman Arc, and can be used in place of various tools with some limitations on placement due to safety and plier head clearance. It will fit other tools in the Free Series, such as the P4 and P2, but placement within the frame will vary among tools. I recommend placing it between the bit holder and the saw on the Arc, specifically, between the bit holder guard, and the spring that sits next to the saw. This placement will provide the most protection against accidental injury. It could also go in place of the saw or file.
The scalpel holder is 0.1mm thicker than the can opener, which is only the thickness of a sheet of paper. As minor as that is, it may still cause the saw to catch on the frame when closing it. If it does, I include a 0.3mm shim/washer to install at the opposite end of the frame - under the pocket clip, between the frame and the plier head spacer. This will give the saw a little extra clearance. This part can go in place of other components, but shims or spacers will be needed to account for differences in thickness.
For the sake of safety, this tool cannot be deployed by pressing at the end the way you can with the bit driver and other internal tools. Doing so would almost guarantee getting stabbed in the palm/thumb. The cam and spring mechanism is fully engaged in the closed position, similar to the 4 main tools. To reduce the risk of accidents and injury as much as possible, I have designed this part to have a two step opening process:
Step one - press down the lock release, or open another component half way, such as the bit holder so that it is perpendicular to the frame.
Step two - with the spring pressure removed from the cam, the scalpel blade holder can be opened easily by the nail groove or nail hook. Once it is opened half way, the bit holder can be closed and the scalpel opened the remainder of the way. It is somewhat complicated, especially compared to the rest of the tools on the free platform, but an extra step is worth not accidentally stabbing yourself.
It uses replaceable No 11 surgical scalpel blades, which run about $10 for 100 on Amazon. No 10 blades will also fit, and probably any other blade that fits a No. 3 style handle. I include five No 11 blades with the package to get you started - international orders may not come with blades due to potential customs issues. These are designed to be an ideal fit with P&P brand blades. Other brands may fit fine and I test the fit with several brands, but since each manufacturer makes them differently, I suggest sticking with P&P brand if they are available to you. If you have to use a different brand blade, and it does not fit properly, feel free to reach out to me for solutions as I have a lot of experience with getting blades to fit at this point.
These are 3d printed in 17-4 PH Stainless Steel which unlike the 300 series of stainless, is attracted to magnets. After printing I fine tune the fit of the blade, pivot, and lock by hand on each piece. They are sand blasted then lightly tumbled in a ceramic abrasive medium.
After installation, check for proper fit and clearance with the frame and other tools, and bend gently one way or another if it hangs up on things on either side. I do my best to check for everything, but some minor tweaking may be necessary after installation.
I will be creating an installation and use video soon, so check back here for a link to that.
It should go without saying, but surgical scalpels are extremely sharp. Your use of this attachment is at your own risk.


